Public: User Documentation : Creating, uploading and using new Molecular Workbench models
This page last changed on Jun 04, 2007 by sfentress.
Creating, uploading and using new Molecular Workbench models
Creating and saving a model
- Open Molecular Workbench by going to the following link: MW homepage, and selecting MW V1.3.
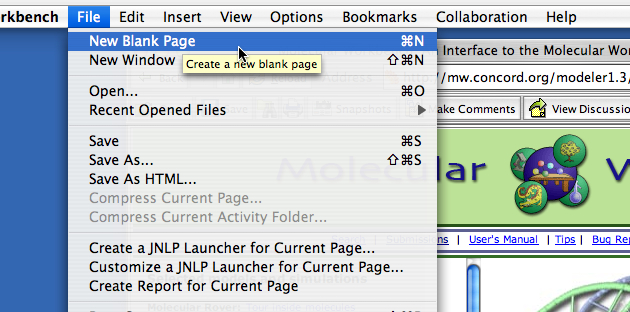
- From the menu, select File, then New Blank Page.
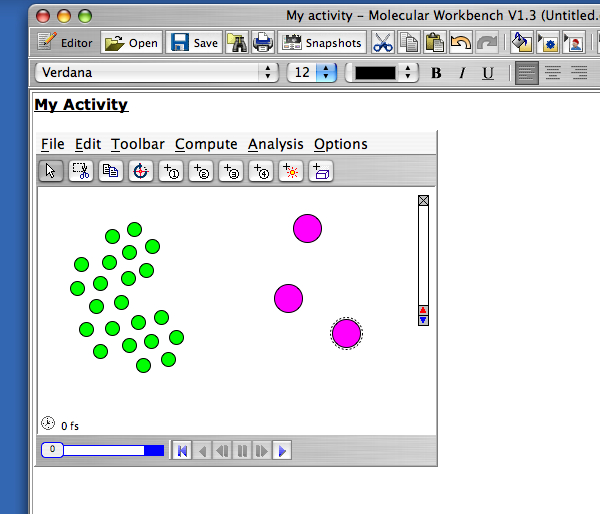
- Give your new model a title, then create your model.
- Save the file to your computer by going to the File menu and selecting either Save or Save As. Create a new folder for your model, and then give your new model a name.

Uploading the model
Now you will upload your model to the Internet:
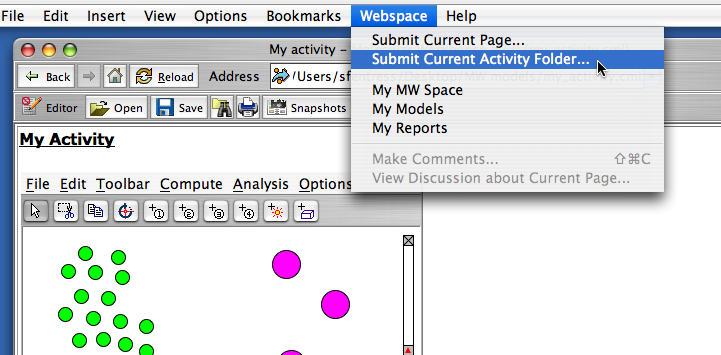
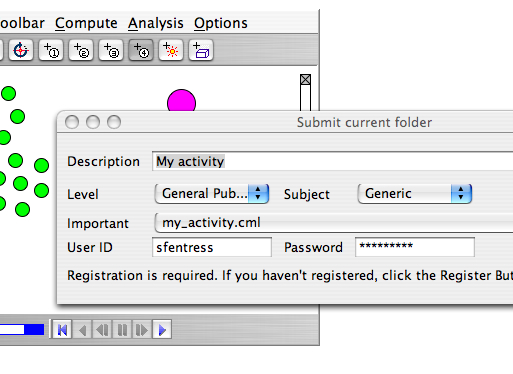
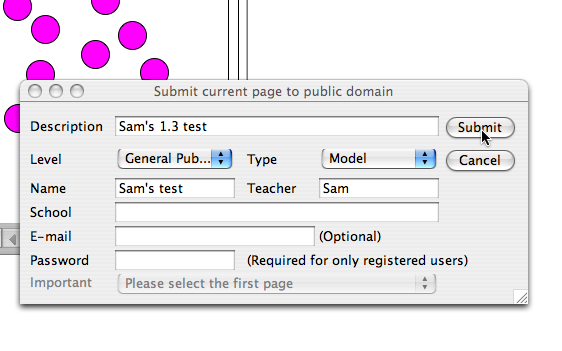
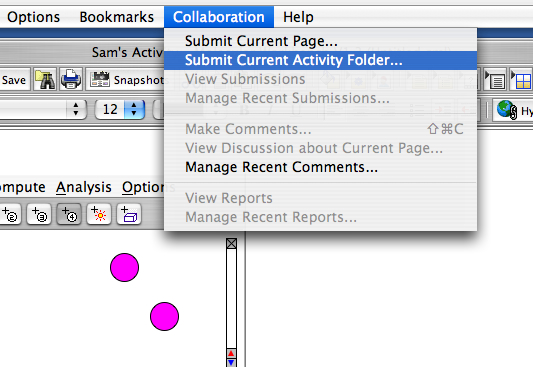
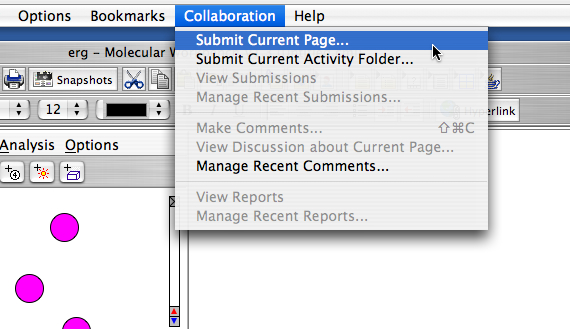
- Select Collaborate from the menu, then select Submit Current Page.
- Select Yes when you are warned that your model will become public.
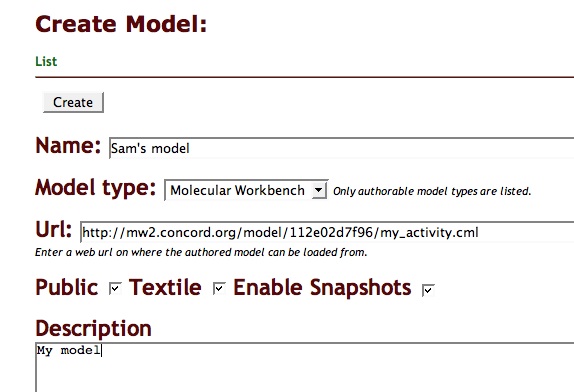
- Enter the appropriate information in the fields of the next window. If you are not registered, no password is necessary.
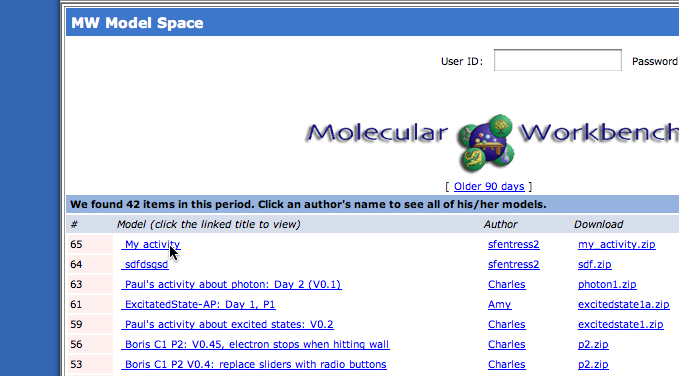
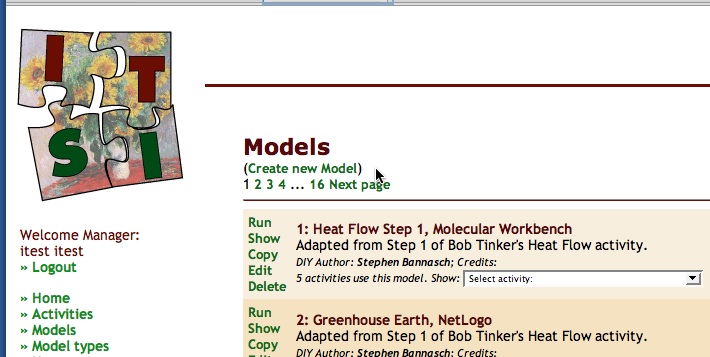
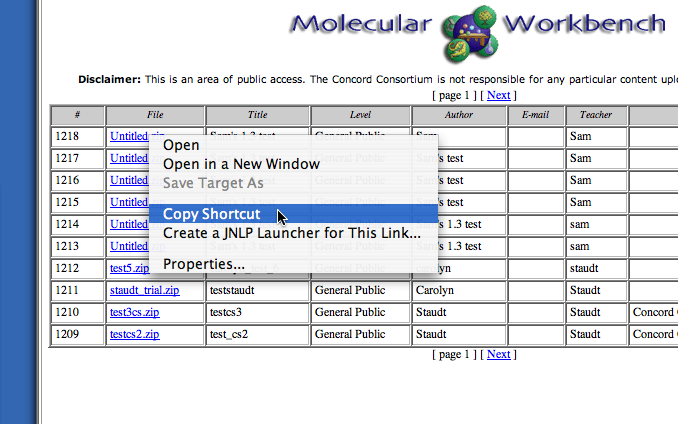
- After you press Submit, your model will be uploaded onto the Molecular Workbench website. Find your new model at the top of the list of models that will appear This will be a link ending in '.zip'. Right click on the filename and select "Copy Shortcut." This will copy the file's URL to your clipboard, and you will need it in step (3) below.


Creating a DIY model
Now you are going to create a new DIY model that uses the Molecular Workbench model you just created.
- Go to http://itsidiy.concord.org, and select Models from the menu of the left.
- Select "New model" from the top of the list of models.
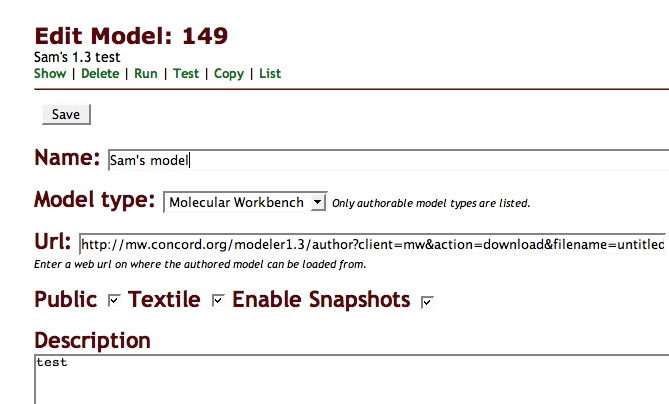
- Give your model a name and select "Molecular Workbench model" as the model type. Copy-and-paste the URL from the address bar of the Molecular Workbench window (from step (6) above), and paste it into the URL field.
- Fill in the rest of the information as necessary. All the fields are optional.
- Hit the Save button at the top or bottom of the screen.
- Now test that the model works by clicking on Run at the top of the model's page.


Using the model
Finally, we are going to create a new activity which uses the model you created:
- Click on the Activities link from the menu on the left.
- Click Create a New Activity from the top of the list.
- Give your new activity a name, an introduction, and any other content you would like.
- Scroll down to the first Data Collection section. Check the box next to Model, and then find and select your new model from the pull-down list (it will probably be near the bottom).
- Click the Save button at the top or bottom of the page.
- Click the Run link at the top of the page.
You should now see your model running in your new activity!